

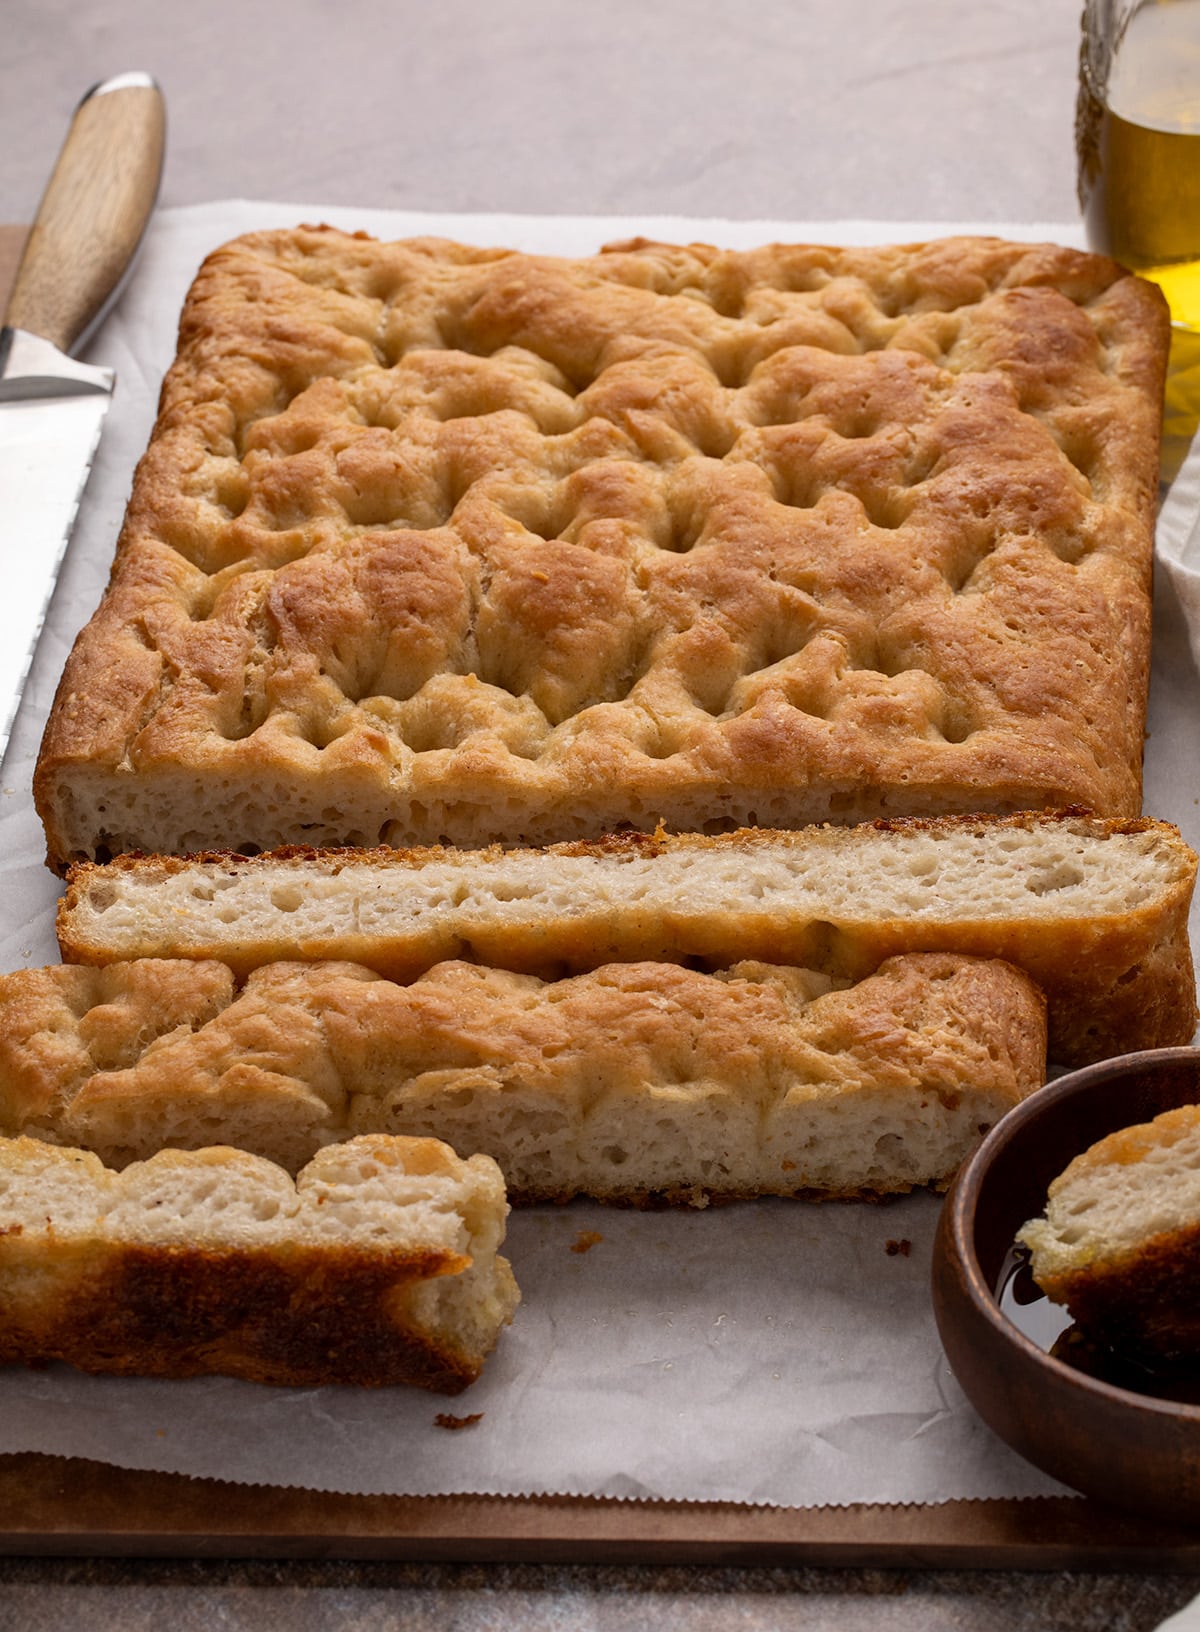
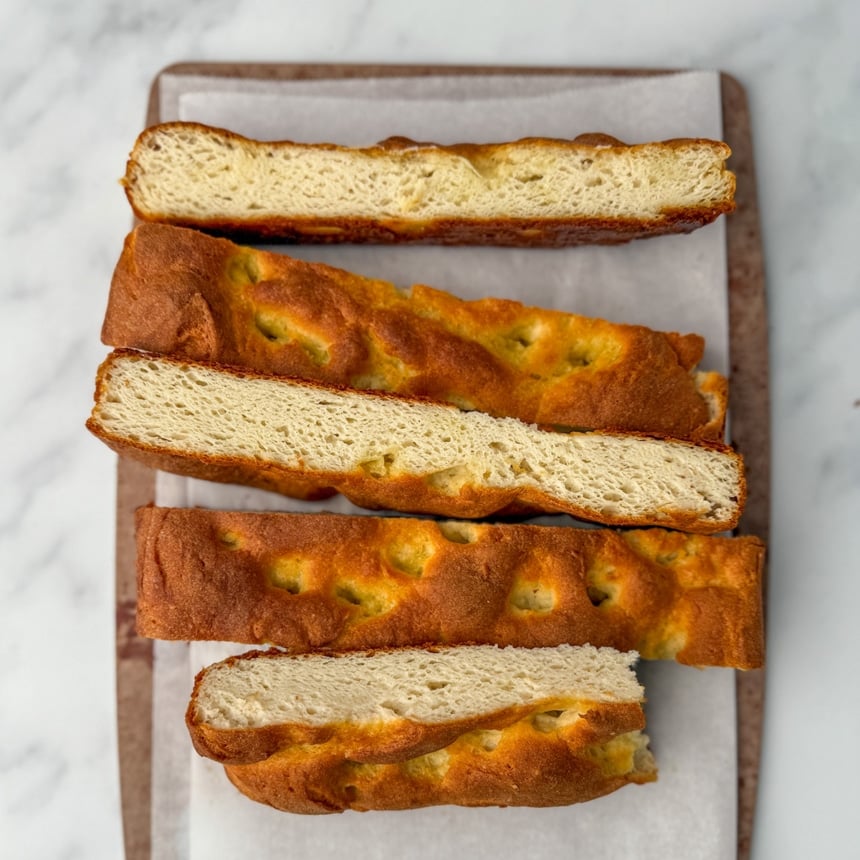
This gluten free focaccia bread is crispy on the skin with a lightweight and ethereal open crumb inside. With solely 7 components, together with water, it could not be simpler to make this authentic-tasting Italian-style flatbread.
Why this recipe works
This recipe solves the issue of dense, gummy gluten-free bread. Its exact, repeatable technique delivers constant, bakery-quality outcomes with the sunshine, open crumb that gluten-free bread typically lacks.
Essentially the most crucial issue is the gluten free flour, particularly King Arthur Flour’s Gluten-Free Pizza Flour mix. My exhaustive testing reveals it supplies one of the best construction for big inside holes, crisp exterior, and a excessive rise different blends cannot fairly match.
Success additionally comes from method. A full four-minute mixture of the dough creates a easy, built-in dough, and two-stage baking maximizes “oven spring” and nonetheless delivers a totally baked inside.
This easy, exacting recipe eliminates guesswork and delivers professional-quality focaccia.

Components defined
There are only some components on this entire recipe. Here’s a bit in regards to the essential position each performs:

- Gluten free pizza flour – King Arthur Flour’s Gluten Free Pizza Flour mix works finest to offer this bread the very best rise and finest genuine crisp texture exterior and ethereal crumb inside. It’s also possible to use Caputo Fioreglut gluten free flour or my very own gluten free bread flour mix, with various outcomes.
- On the spot yeast – Offers this bread its rise and provides taste. I desire on the spot yeast since you needn’t soak it first to dissolve the outer layer earlier than including to the remainder of the recipe.
- Heat water – Hydrates the dough, prompts the yeast, and brings the dough collectively.
- Honey – To feed the yeast and add a contact of depth of taste and sweetness.
- Olive oil – Flavors the bread, provides fats for moisture and tenderness.
- Apple cider vinegar – Provides refined taste and helps to activate the yeast for a greater, pillowy rise.
- Salt – Provides taste, and controls the exercise of the yeast.
How one can make gluten free focaccia
1. Make the dough
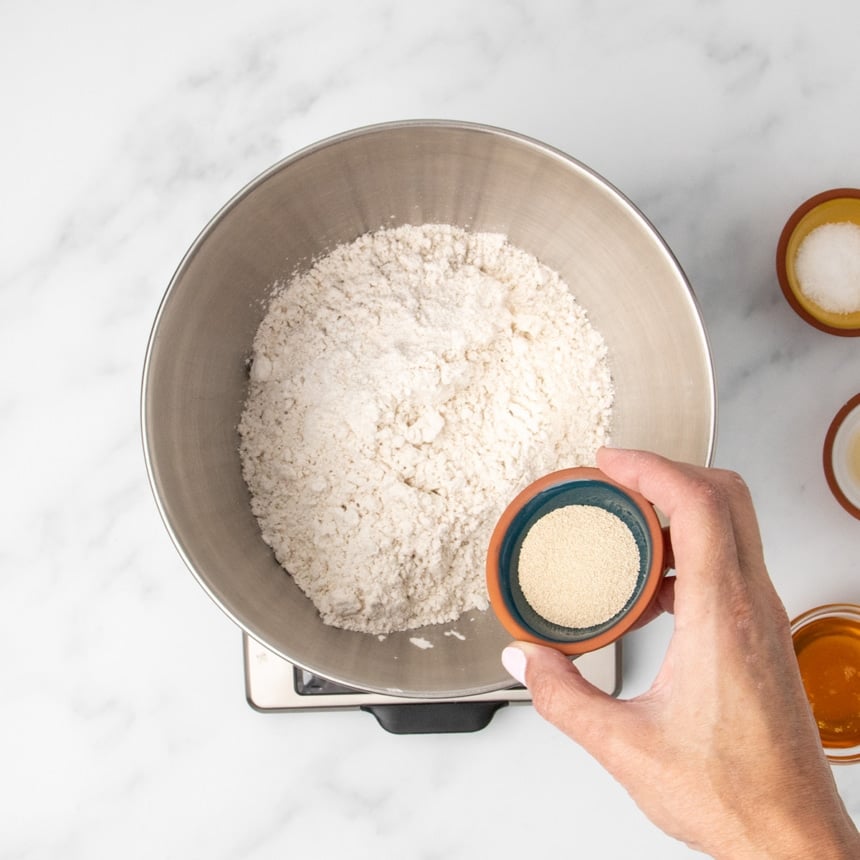
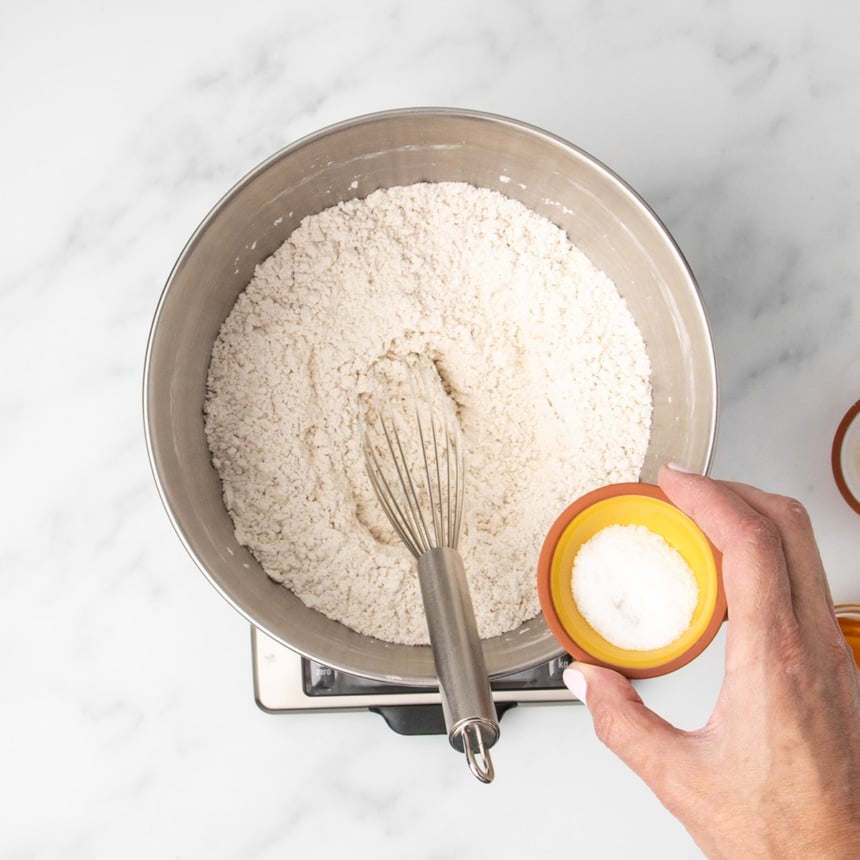
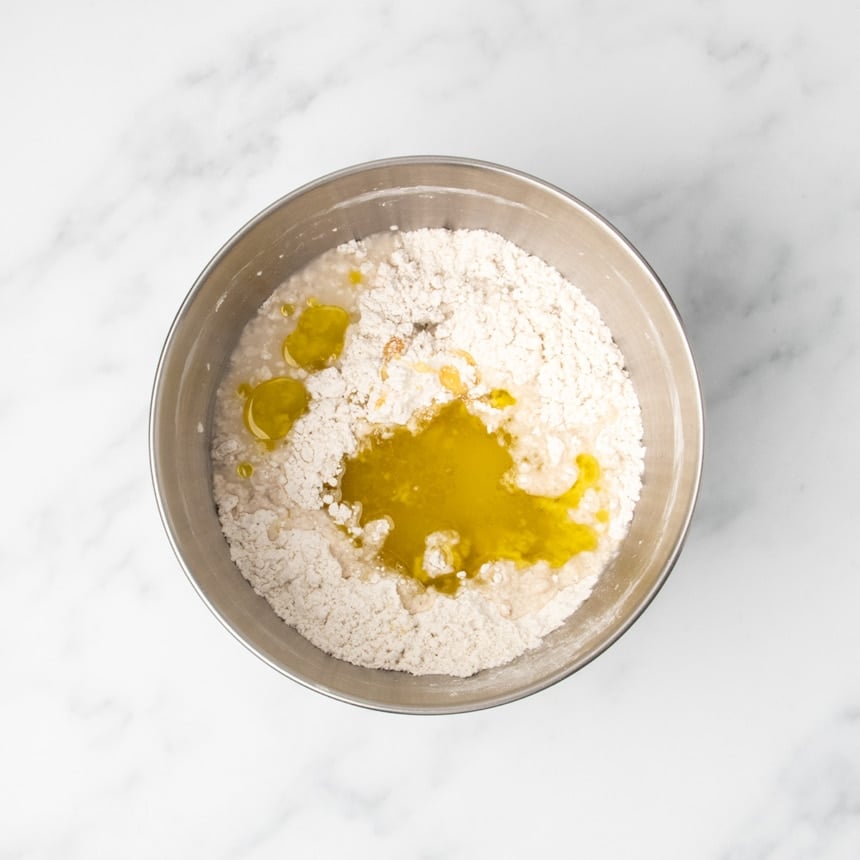
Within the bowl of a stand mixer whisk collectively the flour mix and the moment yeast. Then, whisk within the salt individually to make sure that the salt and yeast do not clump collectively, or the salt will inhibit the yeast improvement an excessive amount of.
Add all of the moist components, the nice and cozy water, then 3 tablespoons of olive oil, vinegar and honey. Pour the water into the middle of the bowl first, after which the opposite liquids on high so the opposite liquids start to mix with the water, reasonably than clumping within the dry components.
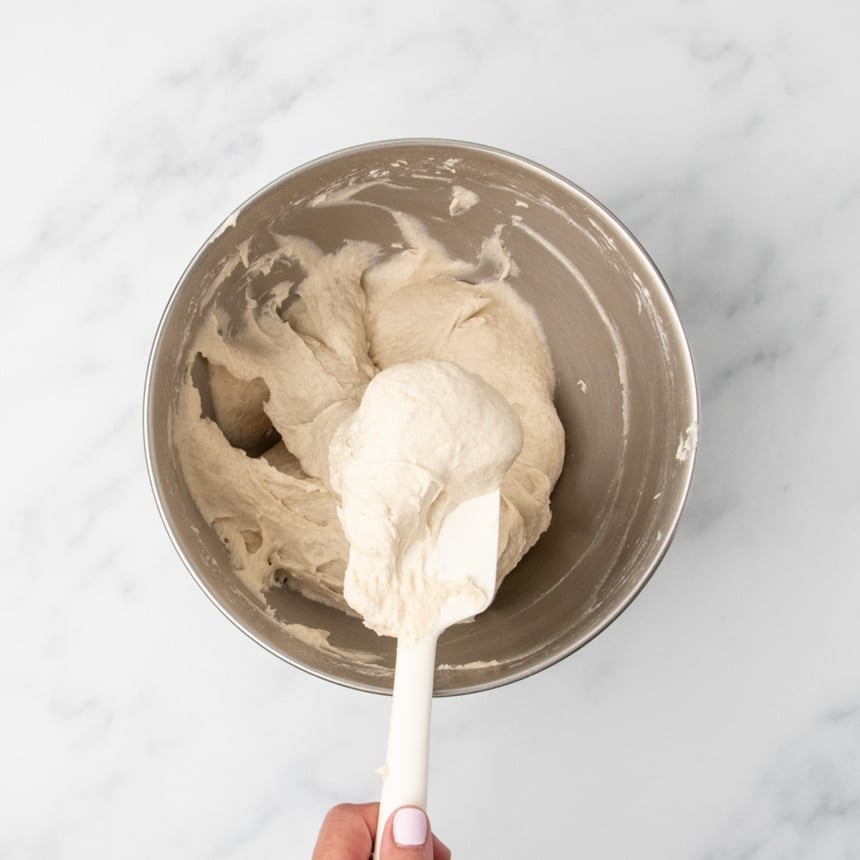
Beat with the paddle attachment first on low pace till a dough begins to type so the dry components do not scatter. Then, flip up the mixer pace to medium-high and beat for 4 full minutes. It will guarantee a totally built-in, easy dough that’s as simple to deal with as attainable (though nonetheless very sticky).

2. Select 1 or 2 rises
The dough shall be very sticky, however ought to simply scrape off the perimeters of the mixer bowl. You’ll be able to both:
- Permit a first rise for taste improvement. Scrape the dough into an oiled proofing bucket or a big bowl, and refrigerate for two hours to 2 days; or
- Proceed proper to the subsequent step in case you’re in any rush. The dough may have much less yeasty taste, however the recipe nonetheless works as supposed.
3. Form and permit last rise
As soon as the dough is prepared for its last (or solely) rise earlier than baking, cowl the underside and grease the perimeters of a 9-inch x 13-inch x 2-inch baking pan.
Keep away from lining the pan with parchment for the crispiest crust. A pan with ridges on the underside will launch the dough most simply.
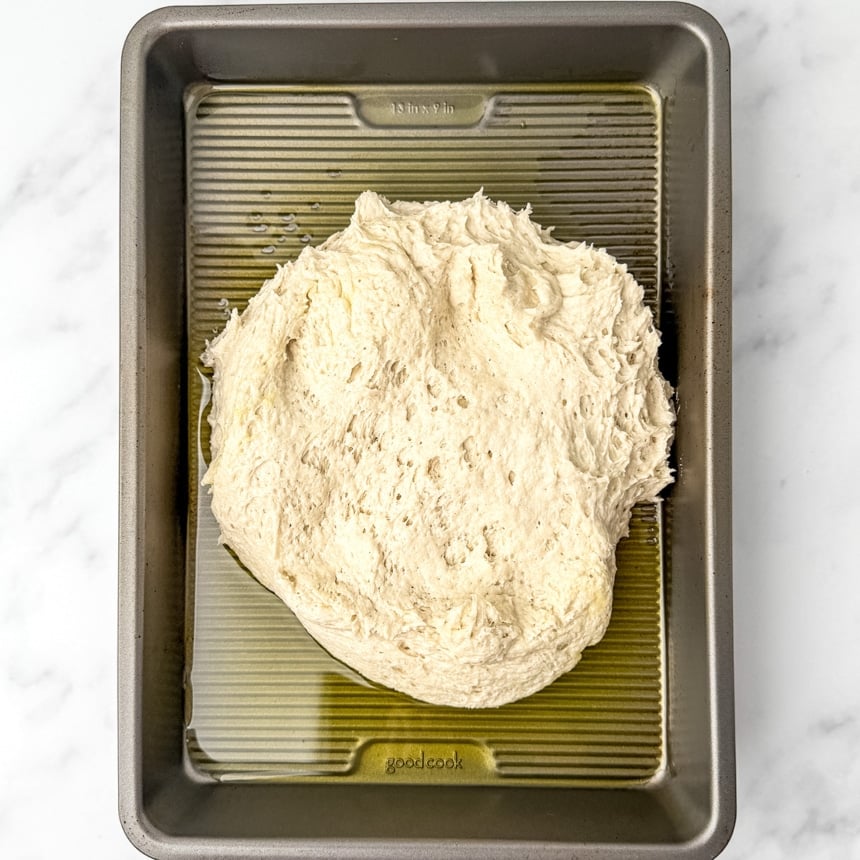
Scrape the dough from both a proofing container or the blending bowl into the ready pan. Oil the highest of the dough and your fingers so it would not persist with your fingers.
Press the dough into as even a layer as attainable within the pan. Among the oil from the underside of the pan will find yourself on high of the dough.
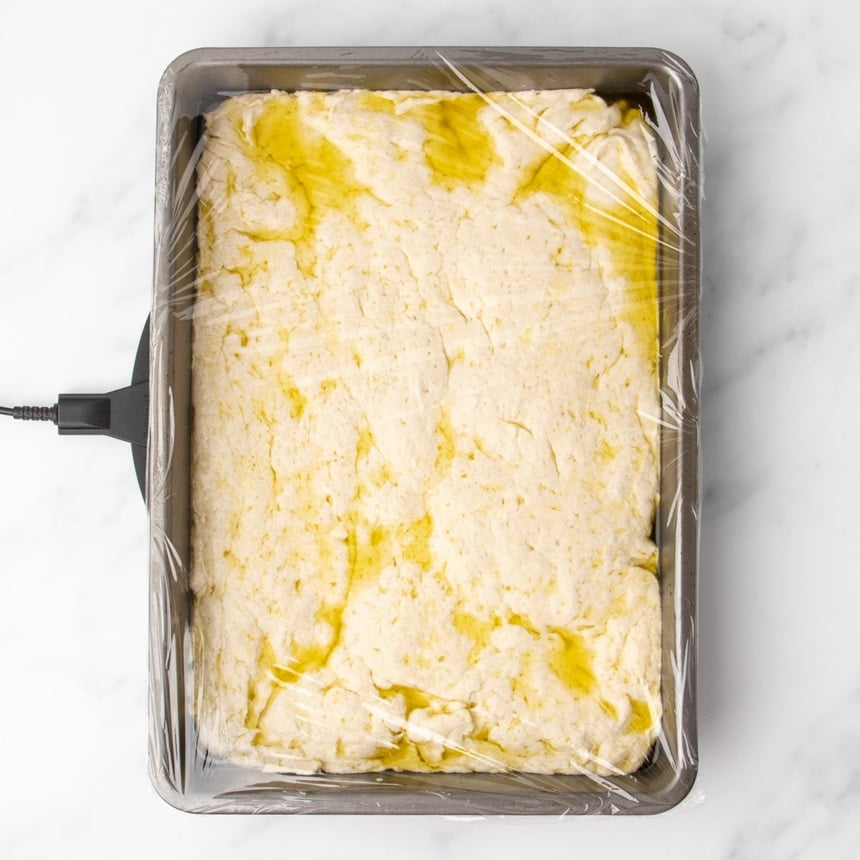
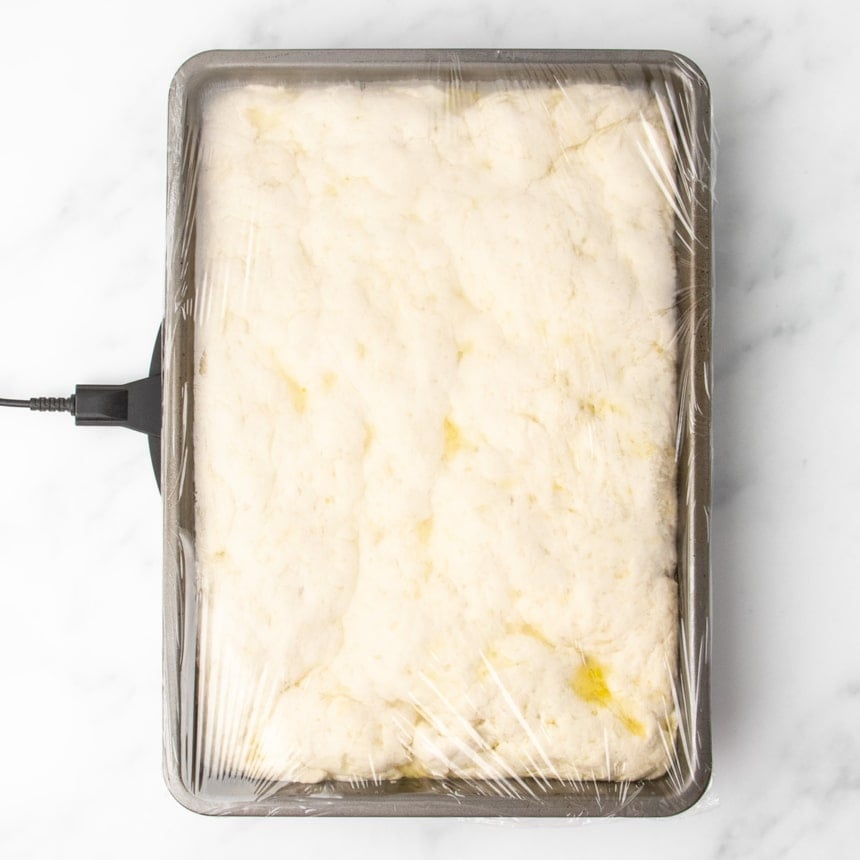
Cowl the baking pan with frivolously oiled plastic wrap to forestall moisture loss. Permit the dough to rise in a heat, draft-free place till it has absolutely doubled in dimension. It will take at the least 2 hours.
4. End shaping and bake
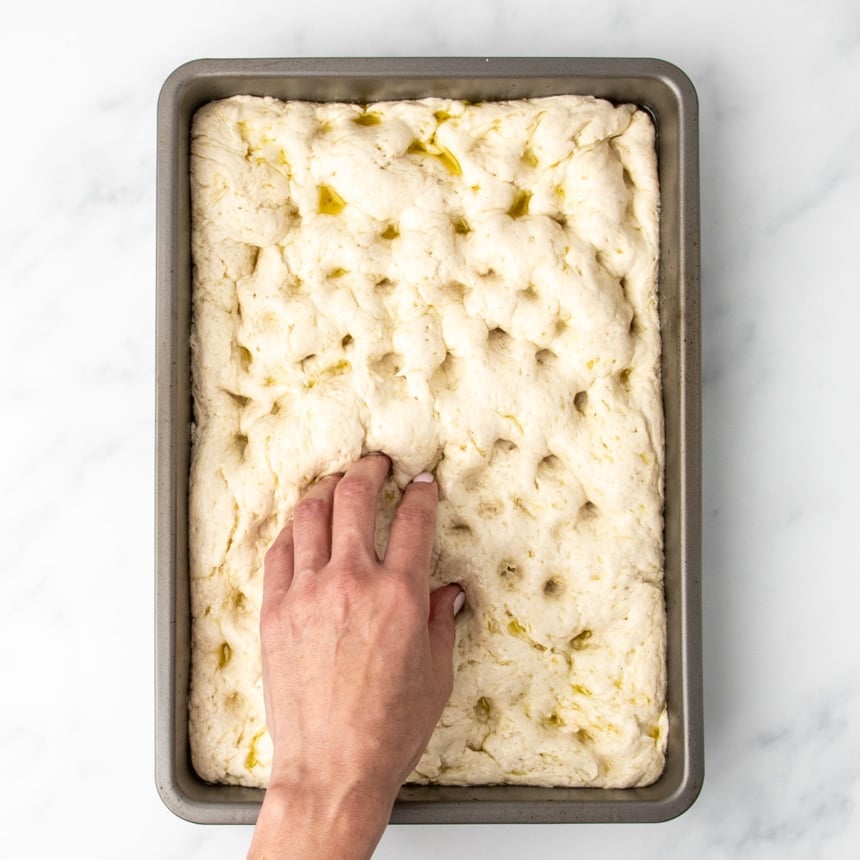
As soon as the dough has risen absolutely, uncover it, and oil your fingers once more generously to keep away from sticking. Rigorously press your fingertips into the highest of the dough straight right down to the underside. This “dimpling” is designed to interrupt any overly giant air bubbles within the dough.
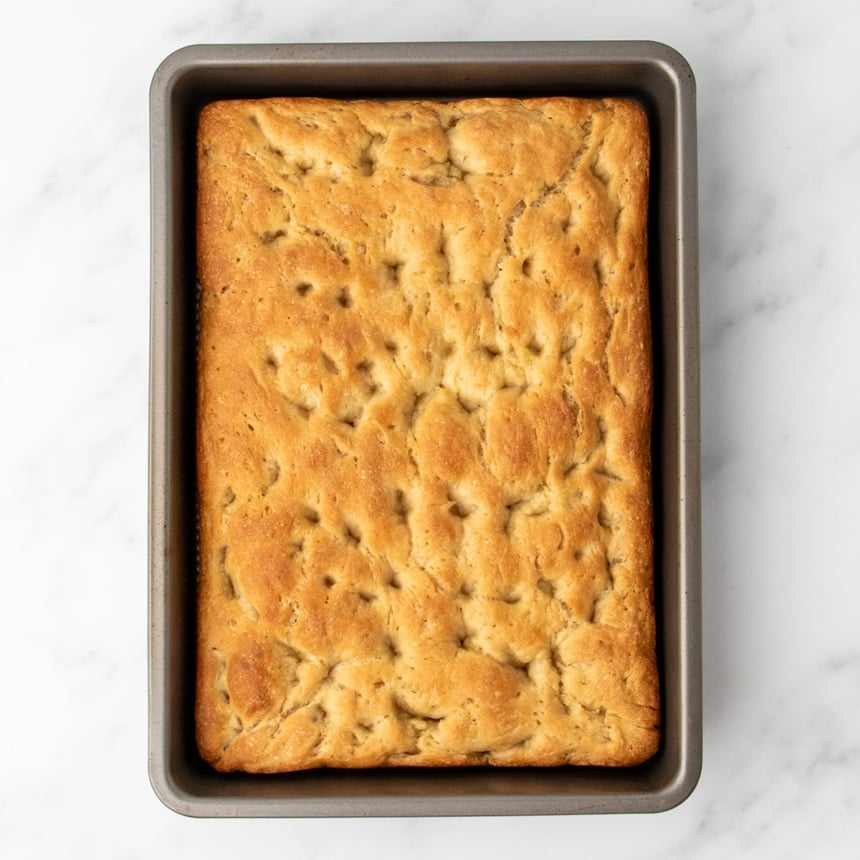
Bake in a preheated 425°F oven for quarter-hour to maximise oven spring for a fluffy, excessive rise and an open, ethereal crumb. Cut back the oven to 375°F to complete baking for an additional 25 minutes with out burning the bread.
The bread is completed when it reads at the least 205°F on an on the spot learn thermometer and the dough has absorbed the oil on the highest and sides.
5. Cool and slice
Let the bread cool on a baking rack for at the least half-hour earlier than slicing and serving. It will enable the bread time for the starches to set. In the event you slice the bread too quickly, the within could collapse and the crumb could flip gummy.

Knowledgeable suggestions
Measure water by weight
This recipe requires 18 fluid ounces of water, a quantity measurement. However 1 fluid ounce of water weighs precisely 1 weighted ounce. So for whole accuracy, and ease of measurement, measure even your water by weight. Your scale will change over to 1 pound when you attain 16 ounces, so search for a weight of 1 pound 2 ounces.
Be affected person throughout rising
In the event you select to permit the dough a primary, chilly rise, that is just for taste improvement and the quantity of rise is unimportant. The second rise is for bulk, although, and that is the place many of the holes within the bread are created. It usually takes at the least 2 hours for the dough to totally double, however it might take longer in case your atmosphere is cool and/or dry.
To assist encourage the rise, flip in your oven to a low temperature (round 300°F) and place your rising dough on high of the vary. Do not place it within the oven, even on the bottom temperature, since which will kill the yeast.
Use olive oil generously
Within the dough itself, restrict the quantity of olive oil to three tablespoons or 42 grams. However when shaping the uncooked dough, oil each the dough and your fingers generously. It will solely add taste to the dough and permit for a easy rise.
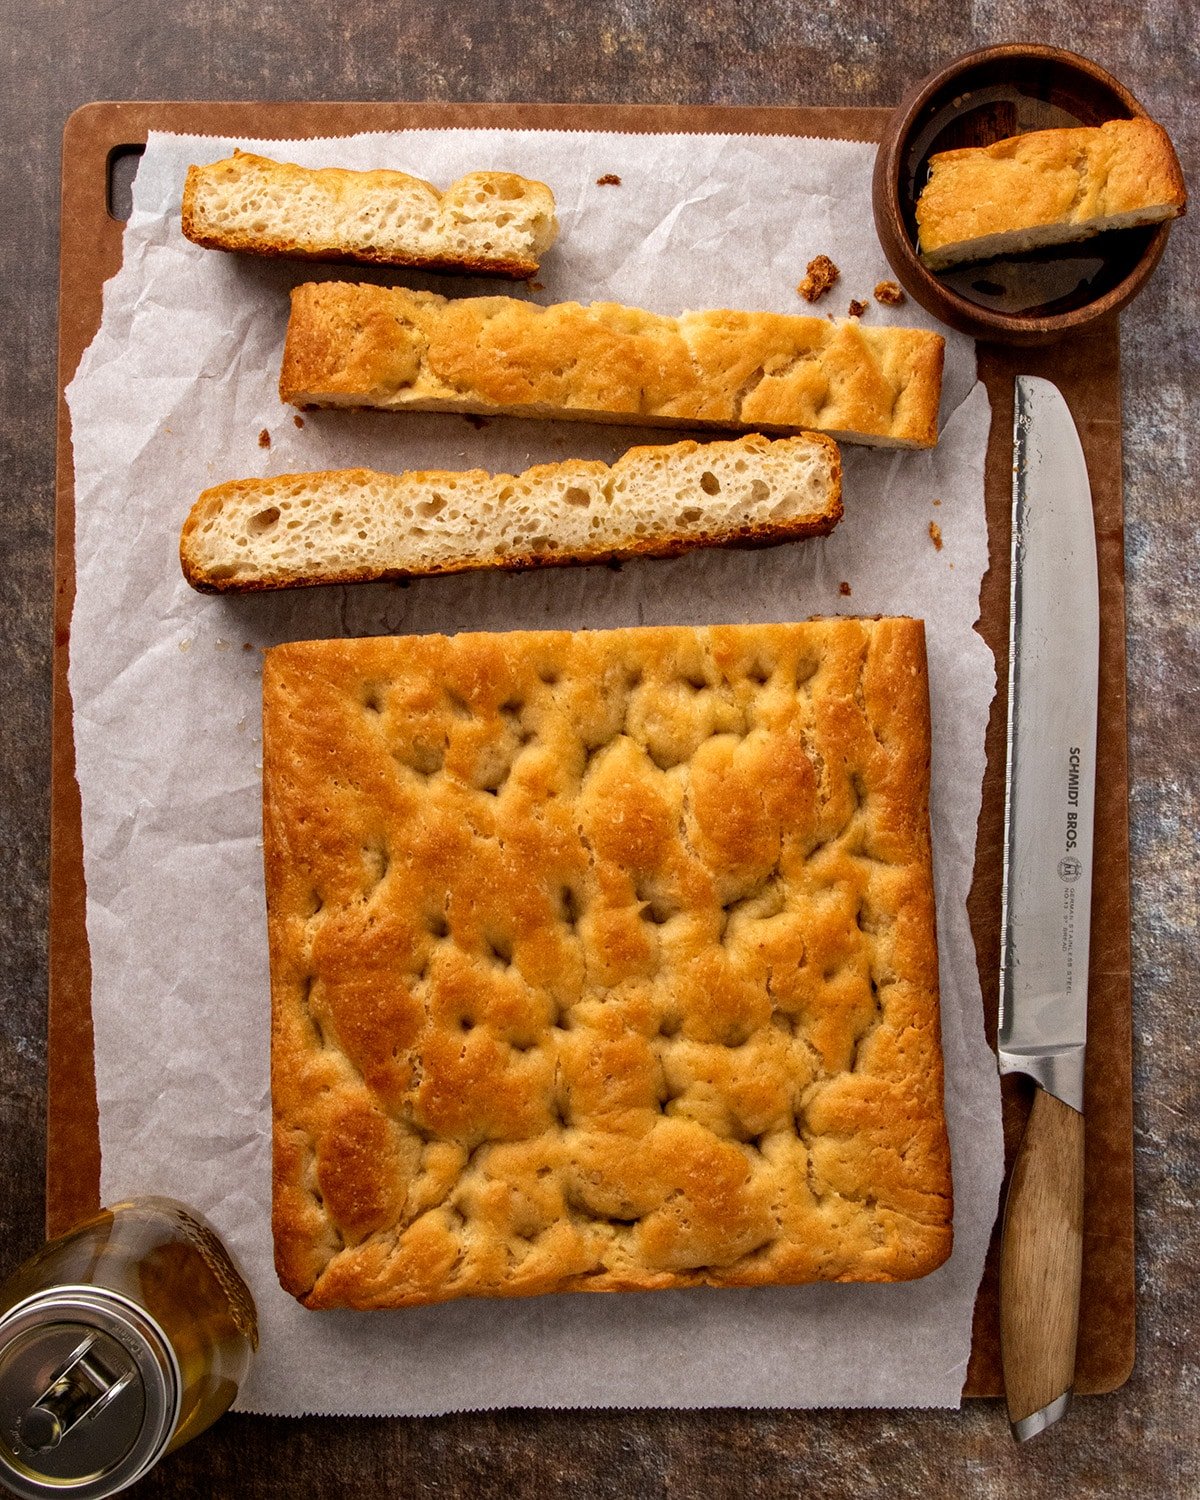
Use a serrated knife
The skin texture of the bread could be very crisp, particularly on the underside, so remember to use a big serrated knife to slice it. It’s also possible to use kitchen shears if the blades are giant sufficient to not get misplaced within the bread.
Ingredient substitutions
The recipe, as written, is already egg-free, gluten-free and dairy-free. My chosen flour mix does include wheat, nevertheless, however not gluten.
Gluten free flour mix
King Arthur Flour’s Gluten Free Pizza Flour is my alternative for this recipe for the most important inside holes and texture and one of the best total texture. You’ll find it simply on-line, and in lots of bigger grocery shops. I have not examined this recipe with their gluten free bread flour mix, however I feel it will work comparatively effectively.
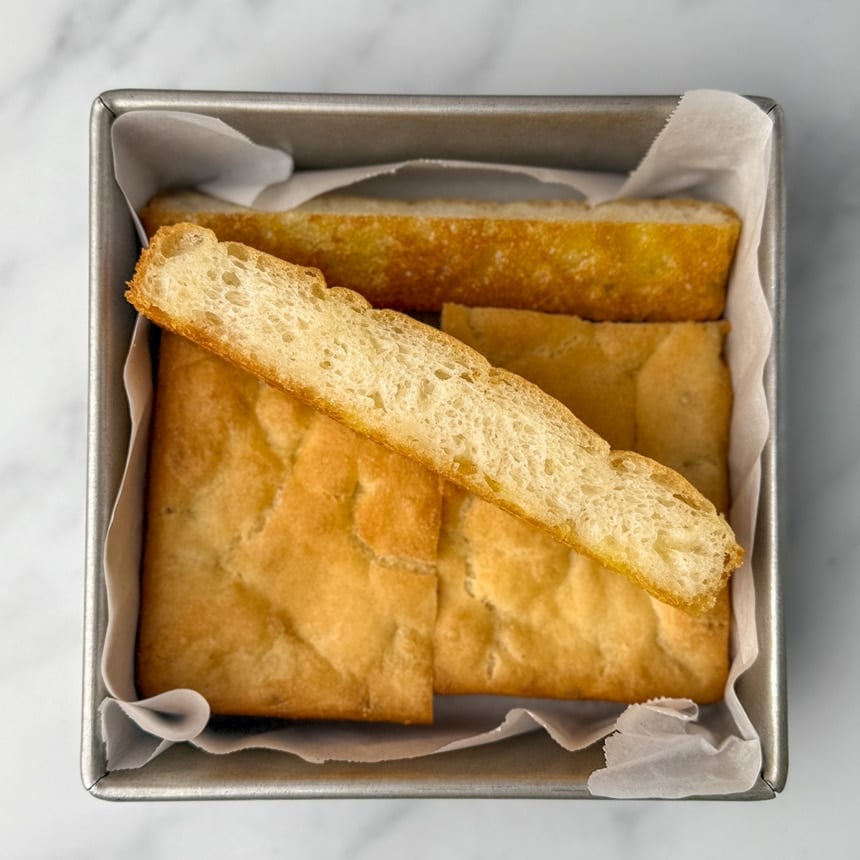
Caputo Fioreglut additionally works fairly effectively right here. I made a half recipe in an 8-inch sq. baking pan, which you’ll be able to see on the left beneath. The bread had smaller, much less ethereal holes, however with nice exterior texture. The bread itself had the least quantity of taste, although, and grew stale the quickest.
I additionally used gluten free bread flour recipe right here, which might see beneath on the proper. The bread made this fashion browns one of the best and has one of the best total taste, however I feel would work higher with one other 1/4 cup (2 fluid ounces) added water. If you’re dairy-free, my mix essentially accommodates dairy protein that may’t be correctly changed.
Wheat-free
Each KAF GF Pizza Flour and Caputo Fioreglut include wheat starch from which the wheat protein has been eliminated. They’re thought-about appropriate for celiacs however not for anybody with a wheat allergy. None of this constitutes medical recommendation, and everybody ought to make the alternatives they’re most snug with.
On the spot yeast
There is no such thing as a non-yeast substitute for yeast. However in case you don’t have on the spot yeast (additionally referred to as breadmaker or rapid-rise yeast), you should utilize lively dry yeast.
To switch on the spot yeast with lively dry yeast, multiply the quantity (by weight) of the moment yeast (right here, 6 grams) by 1.25 or 125%. Right here, that will imply 7.5 grams of yeast. Simply add a bit extra after you attain 7 grams.
Energetic dry yeast has a thicker coating across the yeast, so you need to soak it in some liquid within the recipe (right here, water) till it foams earlier than including it with the remainder of the water.
Olive oil
We use a ton of additional virgin olive oil on this recipe. Be sure to use an oil you actually just like the scent and style of. A impartial cooking oil will crisp the bread, however not add taste, which can make the bread appear oily.
Apple cider vinegar
Apple cider vinegar is especially helpful for encouraging rise in gluten free baked items, each yeast bread and fast breads like muffins. If you cannot have it, you’ll be able to attempt utilizing white wine vinegar instead.

-
Stand mixer with paddle attachment (or meals processor with plastic blade)
-
Giant lidded bucket for proofing or giant bowl with plastic wrap (elective)
-
9-inch x 13-inch x 2-inch baking pan
Forestall your display screen from going darkish
Put together the dough
-
Within the bowl of a stand mixer fitted with the paddle attachment, whisk collectively the pizza flour and on the spot yeast till well-combined. Whisk within the salt till evenly distributed.
-
Add the water, vinegar, 3 tablespoons olive oil, and honey. Combine on low pace with the paddle attachment till a really sticky batter-style dough types.
-
Flip the mixer to medium-high pace and blend for 4 minutes. The dough will nonetheless be fairly skinny and really sticky, however ought to have thickened a bit.
-
You’ll be able to work with the dough immediately, or enable it a chilly rise first for taste improvement.
-
For a chilly rise, switch the dough to a greased 2-quart proofing bucket with tight-fitting lid or a bowl at the least 2-quarts in quantity, and canopy tightly with plastic wrap. Place the bucket or coated bowl within the fridge for at the least 1 hour and as much as 2 days. It should broaden, however stay very sticky.
Let the dough rise
-
On baking day, in case you’ve chilled the dough, or proper after mixing, put together the dough for its (last) rise.
-
Drizzle sufficient olive oil to cowl the underside of a 9-inch x 13-inch x 2-inch pan with 1/8-inch of oil. Flip the pan slowly to unfold it evenly across the floor of the pan, together with greasing the perimeters.
-
Use a greased silicone spatula to scrape the dough out of the blending bowl (or proofing container in case you refrigerated it) into the oiled pan.
-
Drizzle the highest of the dough frivolously and your fingers generously with extra oil. Use your fingers to press and push the dough right into a rectangle about 9-inches x 13-inches, filling the pan, in a single layer.
-
For a extra even layer, use an oiled bench scraper or cake turner to easy the highest of the rectangle as a lot as you’ll be able to.
-
Cowl the highest of the pan with oiled plastic wrap and place it in a heat, draft-free location to rise till at the least doubled in dimension. It will take 2 to three hours.
Bake the bread
-
When the dough is sort of on the finish of its rise, preheat your oven to 425°F.
-
Uncover the pan with the risen dough, drizzle the highest evenly with about 2 tablespoons of olive oil, then oil the information of your fingers generously.
-
Dimple the dough by urgent the information of your fingers into the dough straight right down to the underside of the pan in about half-inch intervals from one quick facet to the opposite.
-
Drizzle the dough frivolously with extra oil if it isn’t already glistening. Place the pan within the middle of the preheated oven and bake for quarter-hour.
-
Cut back the oven temp to 375°F, and bake till the bread is frivolously golden brown throughout, many of the oil has been absorbed, and the interior temperature an instant-read thermometer inserted within the middle reads at the least 205°F (one other 20 to 25 minutes).
-
If the highest is browning too shortly, cowl with aluminum foil till completed baking.
-
Take away the pan from the oven, take away any foil you’ve added, and place the baking pan on a wire rack.
-
Let the bread cool for five minutes within the pan. Take away the pan and place the bread proper on the rack to chill for an additional 30 to 45 minutes to let the starches within the bread set.
-
Slice with a big serrated bread knife and serve.
I’ve made this recipe efficiently utilizing King Arthur Flour (“KAF”) Gluten Free Pizza Flour, Caputo Fioreglut, and my gluten free bread flour recipe.
The KAF gluten free pizza flour makes the bread with the most important holes, and one of the best inside texture.
Caputo Fioreglut makes smaller holes with nice exterior texture and the final quantity of taste.
My bread flour mix browns one of the best and has one of the best total taste, however I feel would work higher with one other 1/4 cup (2 fluid ounces) further water.
Dietary info
Is approximate based mostly on 1 of 6 equal particular person servings, and doesn’t embody olive oil used for drizzling.
Serving: 1serving | Energy: 321kcal | Carbohydrates: 59g | Protein: 5g | Fats: 8g | Saturated Fats: 1g | Polyunsaturated Fats: 1g | Monounsaturated Fats: 5g | Sodium: 1170mg | Potassium: 43mg | Fiber: 2g | Sugar: 6g | Vitamin C: 0.05mg | Calcium: 5mg | Iron: 0.2mg
Diet info is routinely calculated, so ought to solely be used as an approximation.
make forward/leftovers
Storage directions
As with most gluten free breads, focaccia has good texture each in and out the identical day that it is made. If in case you have leftovers, wrap them tightly in plastic wrap and storing in an hermetic container on the counter for as much as 2 days.
For longer storage, I like to recommend you freeze the bread. After it is fully cooled, wrap slices bread tightly in freezer-safe wrap, after which place it inside a zip-top bag earlier than freezing for as much as 2 months.
Defrost by the slice at room temperature, then sprinkle frivolously with lukewarm water and heat at 300°F within the toaster oven till it is warmed by.
Taste variations/toppings
The olive oil and yeast improvement add numerous taste to this bread, however you can too add different savory flavoring. Strive mixing as much as 1 tablespoon dried herbs de Provence into the uncooked dough, add dried herbs on high of the risen bread, or attempt certainly one of these concepts:
- High the risen dough with dried or contemporary rosemary and flaky sea salt on high;
- Add sun-dried tomatoes, chopped garlic, pitted and sliced olives, and/or roasted pink peppers within the dimples after rising;
- Experiment with contemporary herbs like contemporary sprigs of rosemary or contemporary basil and oregano.
FAQs
Sure, you’ll be able to let dough start its last, formed rise within the fridge in a single day. Take away it from the fridge and let it end its rise, nonetheless coated, at room temperature till it is absolutely doubled earlier than baking.
Strive Caputo Fioreglut flour or my gluten free bread flour mix, utilizing Higher Batter’s authentic mix with added whey protein isolate and Expandex.
Certain! Let it bake for the primary quarter-hour at 425°F as directed, then one other 10 minutes at 375°F. Take away the pan from the oven, work shortly so as to add your pizza toppings gently, and return the pan to the oven to complete baking.
No, a “common” all goal gluten free flour mix would not present sufficient construction to create or maintain a excessive sufficient rise to make a focaccia-style bread like this.
Sure! You’ll be able to reduce all the components in half by decreasing the yield from 6 servings to three servings, and bake in an 8-inch sq. pan. The ultimate bake at 375°F shall be shorter.
You’ll be able to attempt utilizing a meals processor fitted with the plastic blade and pulsing the dough till easy. Watch out to not course of for too lengthy or the dough will heat. In any other case, attempt mixing the dough vigorously utilizing a Danish dough whisk in a big mixing bowl till you may have a really easy dough, however I am unable to promise outcomes. Start with a half recipe to keep away from losing components.
